\contentspageHow to make a game like Pong with Felgo - Menus
Tutorial Chapters
-
Overview
-
Creation of a Felgo game
-
GameWindow, Scenes and Physical Worlds
-
The Level and the Ball
-
Level Boundaries
-
Paddles
-
HUD
- Menus
-
AI
-
Special Effects
-
Music and Sound
-
Further Perspectives
No game is complete without a custom font. It is very easy to add a custom font to the game. First of all, search a nice font in True Type Font (.ttf) format and create a fonts folder in your qml directory. Put your font
into this folder. Use a FontLoader item at the end of the FelgoScene.qml to load your custom font which is stored in the fonts directory.
...
FontLoader {
id: fontHUD
source: "fonts/Anton.ttf"
}
..
When using a custom menu, the most important component is an own button which can be styled easily. Create a MenuButton.qml in your qml dir and use a SimpleButton with custom font for
the text to style your MenuButton.
import QtQuick 2.0
import Felgo 4.0
SimpleButton {
font.family: fontHUD.name
color: "black"
textColor: "white"
height: 60
width: 200
}
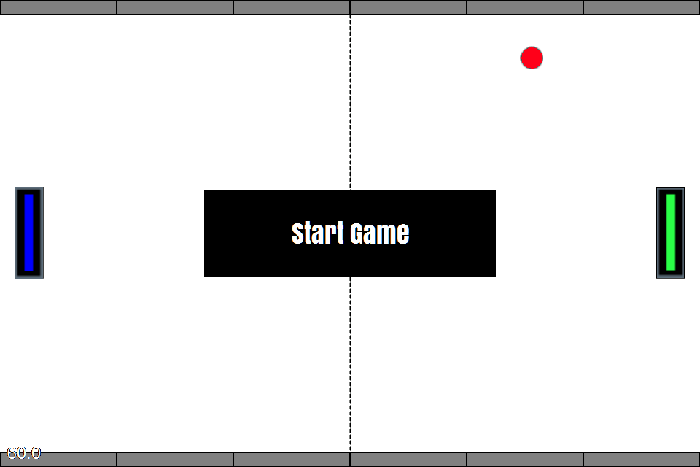
Now you can create a menu with your new Button. Basically you can distinguish between in-game menus and a main menu. The main menu is called directly on start-up which displays settings and other options to start the game.
While the in-game menu is called when the player presses the menu button. You can end the game and return to the main menu or resume the game in the in-game menu. First of all, you need a main menu where you can start the game.
Create a MainMenu.qml and add a Column item with some buttons.
 import QtQuick 2.0
 import Felgo 4.0

 Column {
   anchors.centerIn: parent
   MenuButton {
     text: "Start Game"
     onClicked: {
       scene.state = "game"
     }
   }
 }
Now you have to add the main menu to your scene.
...
MainMenu {
id: mainMenu
visible: true
anchors.centerIn: parent
}
FontLoader {
id: fontHUD
source: "fonts/Anton.ttf"
}
...
Now there is a menu which can not be used yet and you can't play, which is not very satisfying.
As you can see, there is this piece of code
scene.state = "game"
in the main menu button, which is used to change states. Every item can have own states and you can use now different states in your VPongScene to define what happens in which state. This seems to be the perfect technique to
disable and enable the menu. The main states of the game will be main menu, game, and paused game. Each state changes the visibility of defined components.
...
MainMenu {
id: mainMenu
visible: true
anchors.centerIn: parent
}
states: [
State {
name: "mainmenu"
PropertyChanges { target: mainMenu; visible: true}
PropertyChanges { target: hud; visible: false}
},
State {
name: "game"
PropertyChanges { target: mainMenu; visible: false}
PropertyChanges { target: hud; visible: true}
}
]
FontLoader {
id: fontHUD
source: "fonts/Anton.ttf"
}
...
Your game has a start button and starts the game when it is clicked, but you might also want to pause or stop the game. An in-game menu would be a great idea. Create an In-gameMenu.qml in your main qml dir and add a few menu
buttons.
 import QtQuick 2.0
 import Felgo 4.0

 Column {
     spacing: 2
     anchors.centerIn: parent
     MenuButton {
         text: "Main Menu"
         onClicked: scene.state = "mainmenu"
     }
     MenuButton {
         text: "Resume"
         onClicked: scene.state = "game"
     }
 }
Of course, you have to add an instance of the In-gameMenu to the Scene below the MainMenu. The initial visibility should be set to false, because it should not be visible on start in the main menu state. At this
point you should also change the visibility of the HUD element to false because it is not visible too in the main menu state.
...
HUD {
id: hud
height: 60
visible: false
anchors.centerIn: parent
}
MainMenu {
id: mainMenu
visible: true
anchors.centerIn: parent
}
In-gameMenu {
id: in-gameMenu
visible: false
anchors.centerIn: parent
}
...
The in-game menu is available, but how can you call it? Remember the HUD.qml, you have created the middle element "M" (for Menu) which uses a MouseArea.
Adding
scene.state = "pausedGame"
to the MouseArea will enable the in-game menu.
...
MouseArea {
anchors.fill: parent
onClicked: {
scene.state = "pausedGame"
}
}
...
The states in FelgoScene.qml need an update. A new state called pausedGame will be added. Furthermore, you have to add a propertyChanged for the in-gameMenu in the game and
mainMenu states.
...
states: [
State {
name: "mainmenu"
PropertyChanges { target: in-gameMenu; visible: false}
PropertyChanges { target: mainMenu; visible: true}
PropertyChanges { target: hud; visible: false}
},
State {
name: "pausedGame"
PropertyChanges { target: in-gameMenu; visible: true}
PropertyChanges { target: mainMenu; visible: false}
PropertyChanges { target: hud; visible: false}
},
State {
name: "game"
PropertyChanges { target: in-gameMenu; visible: false}
PropertyChanges { target: mainMenu; visible: false}
PropertyChanges { target: hud; visible: true}
}
]
...
You may have recognized that the game still runs when you go to the paused state. The physicsWorld needs to be paused in the paused state. This can be achieved with a StateChangeScript in each
state. It sets the physicsWorld properly and (re)starts the game accordingly.
...
states: [
State {
name: "mainmenu"
PropertyChanges { target: in-gameMenu; visible: false}
PropertyChanges { target: mainMenu; visible: true}
PropertyChanges { target: hud; visible: false}
StateChangeScript {
script: {
level.end()
if(!physicsWorld.running) {
physicsWorld.running = true
}
}
}
},
State {
name: "pausedGame"
PropertyChanges { target: in-gameMenu; visible: true}
PropertyChanges { target: mainMenu; visible: false}
PropertyChanges { target: hud; visible: false}
StateChangeScript {
script: {
physicsWorld.running = false
}
}
},
State {
name: "game"
PropertyChanges { target: in-gameMenu; visible: false}
PropertyChanges { target: mainMenu; visible: false}
PropertyChanges { target: hud; visible: true}
StateChangeScript {
script: {
if(physicsWorld.running) {
level.reStart()
} else {
physicsWorld.running = true
}
}
}
}
]
...
After using states, the onComplete method in the Ball.qml can be removed. Now the ball will be spawned when going to game state.
...
Component.onCompleted: {
reStart(scene.width/2, scene.height/2)
}
...
The game should run successfully now if you start the game; it should pause in the pause menu and it should stop in the main menu.


