\contentspageHow to make a game like Pong with Felgo - The Level and the Ball
Tutorial Chapters
-
Overview
-
Creation of a Felgo game
-
GameWindow, Scenes and Physical Worlds
- The Level and the Ball
-
Level Boundaries
-
Paddles
-
HUD
-
Menus
-
AI
-
Special Effects
-
Music and Sound
-
Further Perspectives
The Level and the Ball
Now you will start to fill your Scene with objects. After your setup of the Scene - the game world - driven by a physical simulation, you have to add, remove, collect and arrange items, for instance, a ball. In a simple
case, you add and arrange your game items in a level. Adding a level works similar to your VPongScene.qml. When the Level.qml was created, remove the Rectangle of the file and add the level item code from below.
import QtQuick 2.0
import Felgo 4.0
Item {
anchors.fill: gameWindowAnchorItem
}
Similar to the Scene, you have created a level template which needs to be added to the game Scene as Level item. The Level size is the same as the Scene size because you want to use the whole game world in your level and not
only a part of it.
...
PhysicsWorld {
id: physicsWorld
z: 1
updatesPerSecondForPhysics: 60
velocityIterations: 5
positionIterations: 5
}
Level {
id: level
width: parent.width
height: parent.height
}
...
Now you are able to add some objects to you level. For better maintenance and several other reasons you have to add an EntityManager in your GameWindow. More information about the EntityManager and the whole Entity concept can be read in Entity Based Game
Design. The position where EntityManager is added does not matter, it is only important that you add it as a GameWindow child so it is accessible
from all other scenes.
...
fpsTextItem.color: "white"
displayFpsEnabled: true
EntityManager {
id: entityManager
entityContainer: scene.entityContainer
}
VPongScene {
id: scene
}
...
The EntityManager needs to know which component is responsible for entity creation. Therefore, you provided the binding of the entityContainer in the EntityManager item
entityContainer: scene.entityContainer
, but currently the Scene does not provide an entityContainer property. You already created an Level item which is responsible for your entity creation in future. Therefore, you can add a simple alias at the start of your
Scene.qml to signal that the Level is used as entity container. Additionally, an alias for the level should be added to get access to the level item from every scene element.
 ...
   width: 480
   height: 320

   property alias level: level
   property alias entityContainer: level

   PhysicsWorld {
 ...
Now the project is ready to receive the first entity. As you will create different entities, such as, Ball, Wall, Goal and Paddle it would be great idea to collect them in one directory in your project. Create a new folder
in your VPong/qml directory, called entities, and add a new Ball.qml file in this new entities folder. Remove the Rectangle and replace it with following Code:
import QtQuick 2.0
import Felgo 4.0
EntityBase {
id: entity
entityType: "ball"
CircleCollider {
id: circleCollider
radius: sprite.width/2
anchors.centerIn: parent
fixture.friction: 0
fixture.restitution: 1.0
bullet: true
body.fixedRotation: true
}
Rectangle {
id: sprite
width: 16
height: 16
anchors.centerIn: parent
}
}
The ball is an EntityBase with entity type "ball". This helps to identify the entity when using the EntityManager. In this Entity you can place a
debug Rectangle to see the ball afterwards. The Rectangle will be replaced later on by a real Sprite. For now it is a Rectangle with 16*16 pixels. The entity itself does not have a size because the size will be defined from the
sprite later on. The center of the Rectangle is the center of the entity. The CircleCollider is the physical representation of the ball which is also centered in the entity. This element
is used by the physics engine to calculate the collisions and to simulate the entity. The radius of the CircleCollider is set to the sprites width because the image size will define the
size of the object later on. The properties, such as friction, restitution, density are set to values which are needed to get correct behavior of a pong ball. Now you can add the ball entity to your level. Just center it in the
level. The ball entity will not be known by the system so you have to add an import. Furthermore you can add an alias because the ball will be used in other objects, for instance in the Paddle entity to calculate the position
for the AI.
...
import "entities"
Item {
anchors.fill: gameWindowAnchorItem
property alias ball: ball
Ball {
id: ball
x: gameWindowAnchorItem.width/2
y: parent.height/2
}
...
You should also add an alias in your FelgoScene.qml to grant access in all scene elements.
 ...
   width: 480
   height: 320

   property alias level: level
   property alias entityContainer: level
   property alias ball: level.ball

 ...
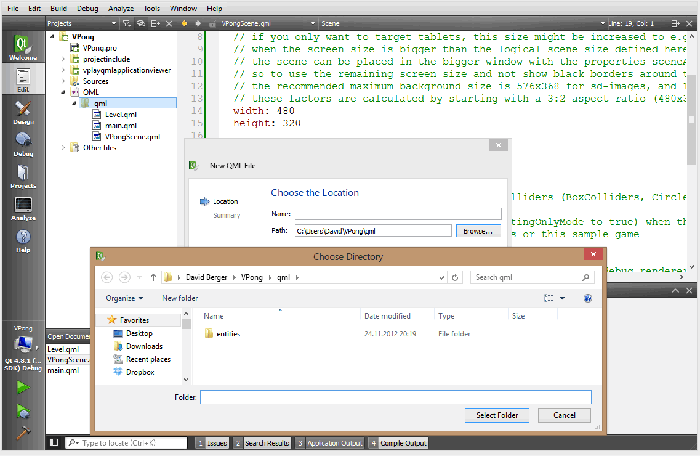
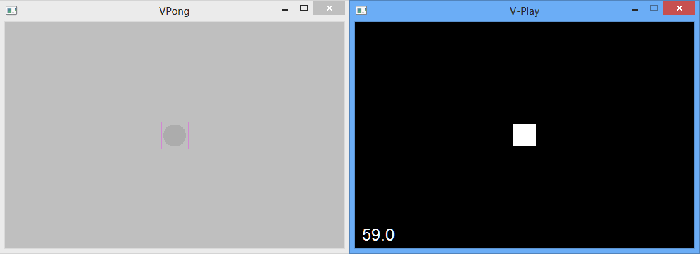
Now you can see your Ball Rectangle in the middle of the GameWindow when you run VPong. If you want to debug the physics you will have to use the qml renderer. It can be de-/activated in
main.cpp by changing the flag
vplayApplication.setQmlRendererEnabled(false);
Once activated, two windows will be displayed.
Now it is time to add a background image. First you should create an img folder in your qml directory. Then you can create a nice background image 1140px*720px as suggested in How
to create mobile games for different screen sizes and resolutions in this img folder.
After you have added a MultiResolutionImage in the Level.qml before the Ball you can see your new image in-game.
...
property alias ball: ball
MultiResolutionImage {
id:levelBackground
source: "../assets/img/background.png"
anchors.centerIn: parent
visible: true
}
Ball {
id: ball
x: gameWindowAnchorItem.width/2
y: parent.height/2
}
...
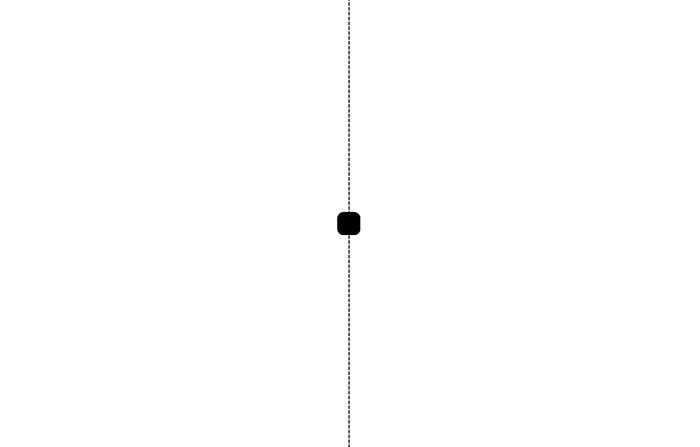
A Rectangle as ball is great, but a real pong ball would be much better.

You can replace the Rectangle in Ball.qml with a GameSprite item which loads a black ball with the size of 16px*16px placed in your img folder.
import QtQuick 2.0
import Felgo 4.0
EntityBase {
id: entity
entityType: "ball"
CircleCollider {
id: circleCollider
radius: sprite.width/2
anchors.centerIn: parent
fixture.friction: 0
fixture.restitution: 1.0
fixture.density: 0.001
bullet: true
body.fixedRotation: true
}
Image {
id: sprite
source: "../../assets/img/ball.png"
anchors.centerIn: parent
}
}
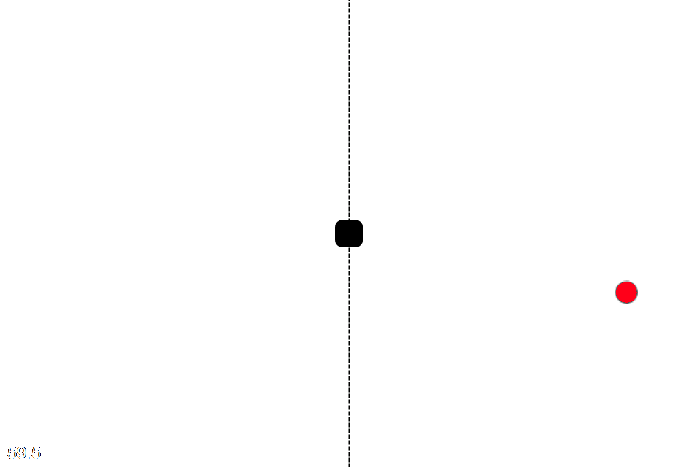
The ball is now in the middle of the screen and not visible. Therefore you should add a function to your Ball.qml which shoots the ball from the middle of the screen towards the edge on start-up. First of all, the position
and the initial velocity is reset to the initial values. Afterwards a random angle between -45 and 45 degree is created and then a random side is selected. Following the direction is multiplied with the speed in pixel per
second which gets applied to the ball as linear impulse. When the application is started, the Component.onComplete() function will call reStart() which restarts your ball and the physic system moves the ball.
...
property int speed: 400
...
Image {
id: sprite
source: "../../assets/img/ball.png"
anchors.centerIn: parent
}
function applyForwardImpulse(accSpeed) {
var localForward = circleCollider.body.toWorldVector(Qt.point(accSpeed,0));
circleCollider.body.applyLinearImpulse(localForward, circleCollider.body.getWorldCenter());
}
function reStart(posx,posy) {
reset(posx,posy)
var angle = getRandomInt(-45, 45)
if (Math.abs(angle) < 5 || Math.abs(angle-180) < 5)
angle = getRandomInt(10,20)
if(Math.random() > 0.5)
angle += 180
if (typeof(Number.prototype.toRad) === "undefined") {
Number.prototype.toRad = function() {
return this * Math.PI / 180;
}
}
var x = Math.cos(angle.toRad())*speed
var y = Math.sin(angle.toRad())*speed
circleCollider.applyLinearImpulse(Qt.point(x, y), circleCollider.pos)
}
function reset(xpos,ypos) {
x = xpos
y = ypos
speed = 400
entity.rotation = 0.0;
circleCollider.linearVelocity = Qt.point(0, 0)
}
function linearVelocity() {
return circleCollider.linearVelocity
}
function getRandomInt(min, max) {
return Math.floor(Math.random() * (max - min + 1)) + min;
}
Component.onCompleted: {
reStart(scene.width/2, scene.height/2)
}
...
Finally you have created a moving ball, but it would be great to have some walls around the game field, right?


