Integrate with GameCenter to send your games' to Apple Game Center on iOS devices.
Increase Engagement
Use Game Center to track your users' best scores on a leaderboard and compare their achievements.
Challenges
Allow users to challenge their friends on a specific highscore within your game.
Overview
Note: The plugin currently only supports iOS-based devices.
The GameCenter plugin supports the following features:
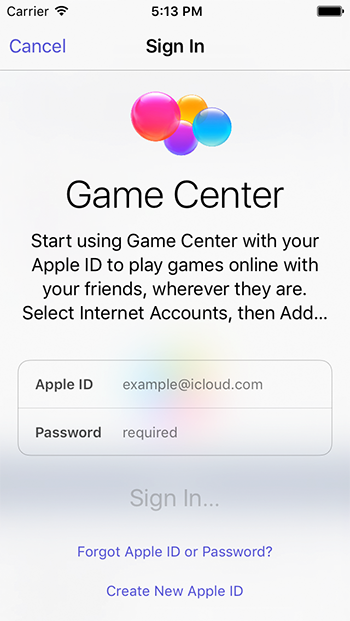
- Authentication: Allows players to create and access a Game Center account on iOS-based devices.
- Leaderboards: Allows to post players' highscores to different leader boards and compare them to friends and to display high score lists within your game.
- Achievements: Track a player's accomplishments in your game.
GameCenter Examples
Plugin Demo App
To try the plugin or see an integration example have a look at the Felgo Plugin Demo app.
Please also have a look at our plugin example project on GitHub: https://github.com/FelgoSDK/PluginDemo.
Example Usage
The following example shows how to integrate Game Center into your game. Usually you define one item within your GameWindow item and reference it with its id:
 import Felgo

 GameWindow {

   GameCenter {
     id: gameCenter
   }

 }
Available QML Items
|
GameCenter
|
Integrate with GameCenter to send your games' highscores from Felgo Game Network to Apple Game Center on iOS devices
|
Adding and Activating Plugins
How to Add a Felgo Plugin to your App or Game
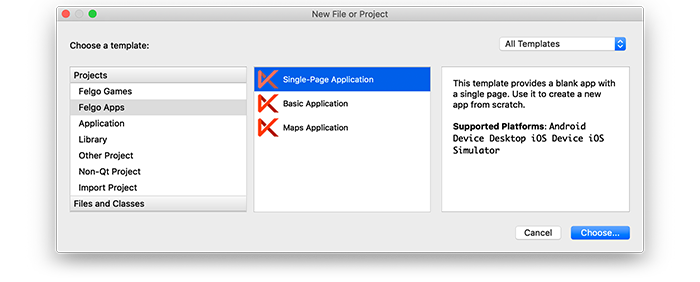
When you create a new project, you can choose to add example plugin integrations as well. Open Qt Creator and choose “File / New File or Project”, then choose Single-Page Application in the Felgo Apps section or any
other wizard. For Felgo Games, you can also find an own Game with Plugins project template as an own wizard.
Then select the platforms you want to run your application on. The plugins are available for both iOS & Android. There is a fallback functionality in place on Desktop platforms so your project still works when you call
methods of the plugins. This allows you to do the main development on your PC, and for testing the plugin functionality you can run the project on iOS and Android.
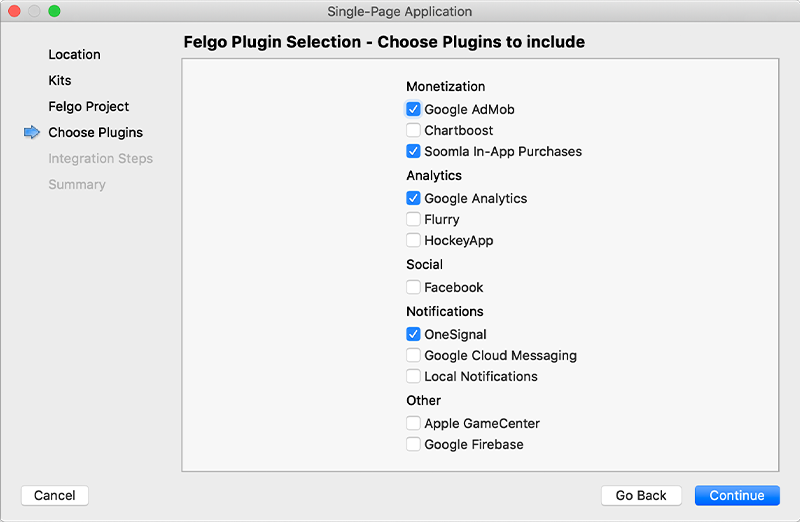
After the Kit Selection, you can choose which of the plugins you’d like to add to your project:
Then complete the wizard, your project is now set up with all the correct plugin dependencies for Android & iOS automatically. This includes:
- Setting up the
.gradle file for Android.
- Setting up the
.plist file for iOS.
- Setting up the
CMakeLists.txt file to include the plugin libraries for iOS.
Note: Additional integration steps are still required for most plugins, for example to add the actual plugin libraries for iOS to your project. Please have a look at the integration steps described in the
documentation for each of the used plugins.
If you have an existing Felgo application, follow these steps to include a plugin to your app or game:
In Qt Creator, select “File / New File or Project” and choose either Felgo Games or Felgo Apps from Files and Classes. Then select Felgo Plugin and press Choose.
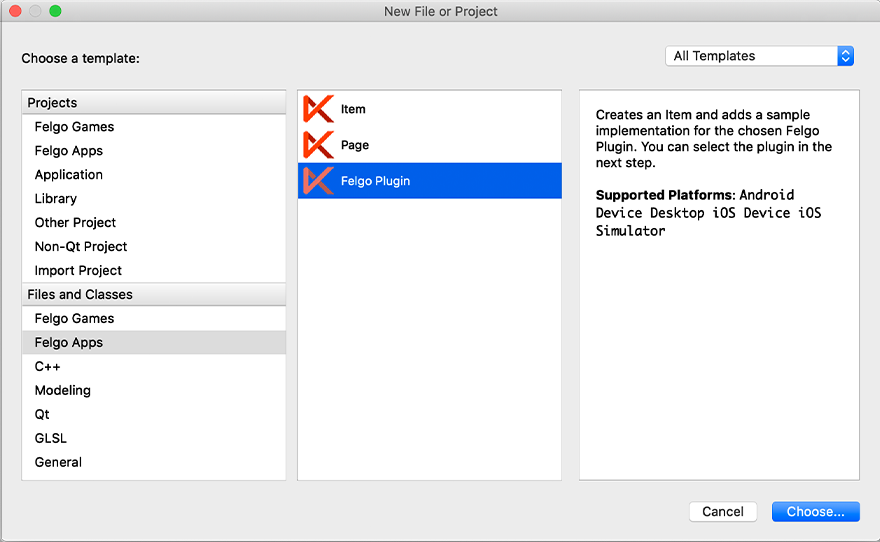
You can now select the plugin you want to add:

The plugin item, which contains the chosen plugin and a short usage example, is now added to your project. To use the item in your project, simply perform these steps:
- Include the created item (use the name you entered in the template before) in your
main.qml file.
- Modify the
CMakeLists.txt file & .plist file for iOS usage. See the iOS integration guide of the chosen plugin for more information.
- Modify the the
.gradle file for Android usage. See the Android integration guide of the chosen plugin for more information.
Note: If you have an existing Qt application, you can also add Felgo Plugins to your app! See here
how to do this.
Activating Plugins with a License Key
You can test all plugins as soon as the required integration steps and plugin configuration are completed.
However, the plugins are only available as Trial Versions if they are not activated with a valid license. When you are using unlicensed plugins, a dialog is shown and a watermark overlays your application to notify you about
the testing state of the plugin.
All monetization plugins are free to use in all licenses, other plugins are only fully usable if you have purchased the Startup or Business license. To activate plugins and enable
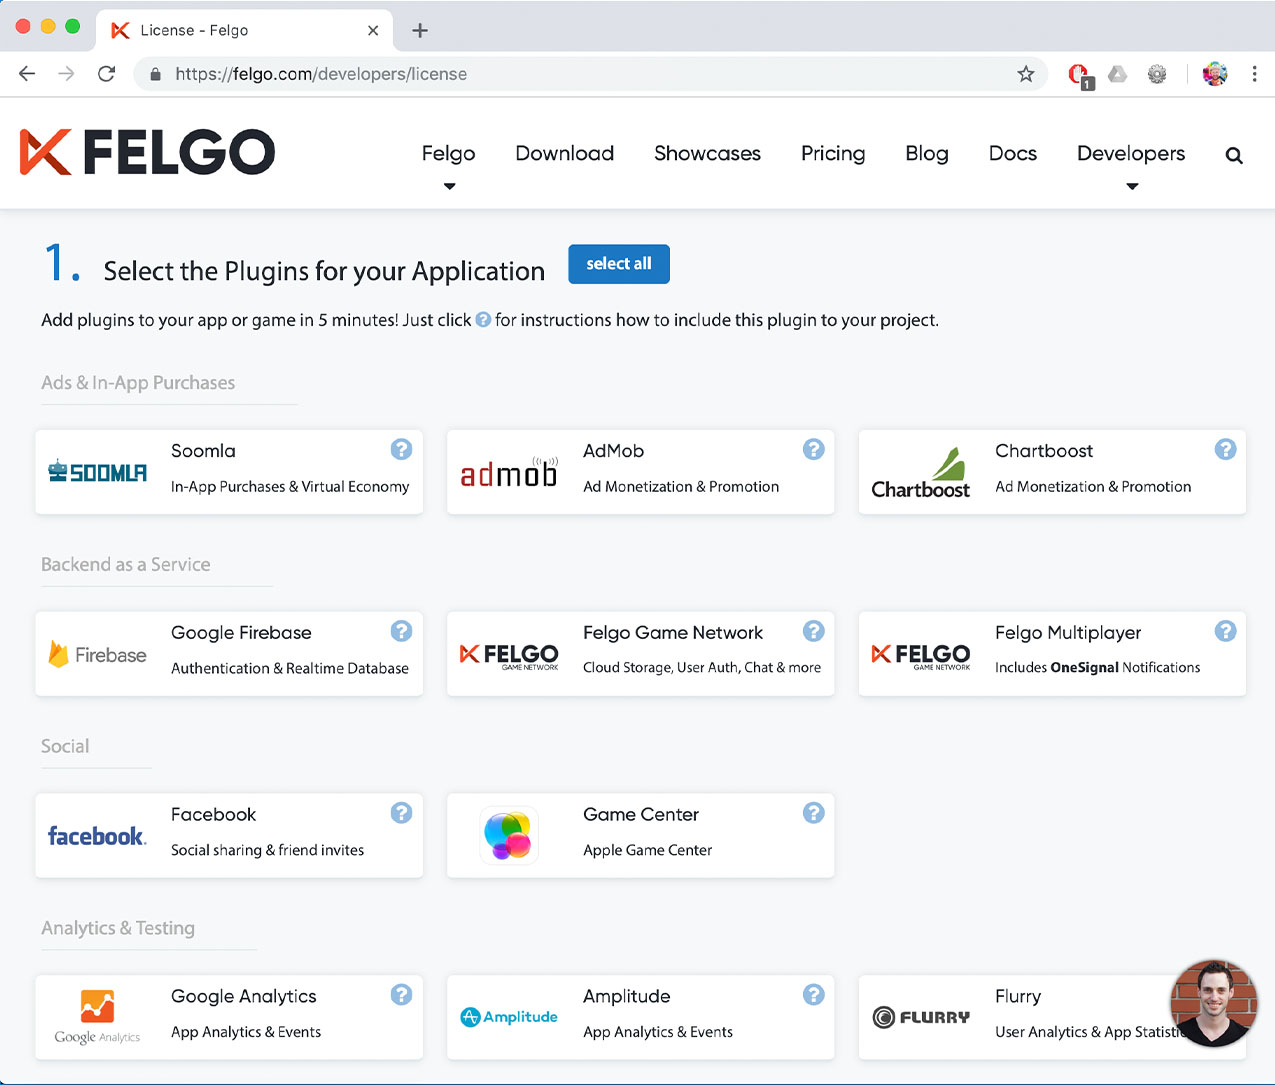
their full functionality it is required to create a license key. You can create such a key for your application using the license creation page.
This is how it works:
- Choose the plugins you want to include in your license key:
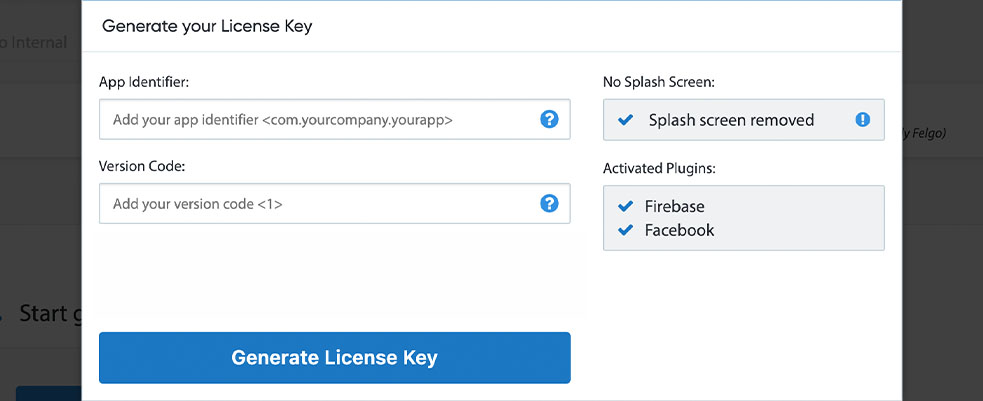
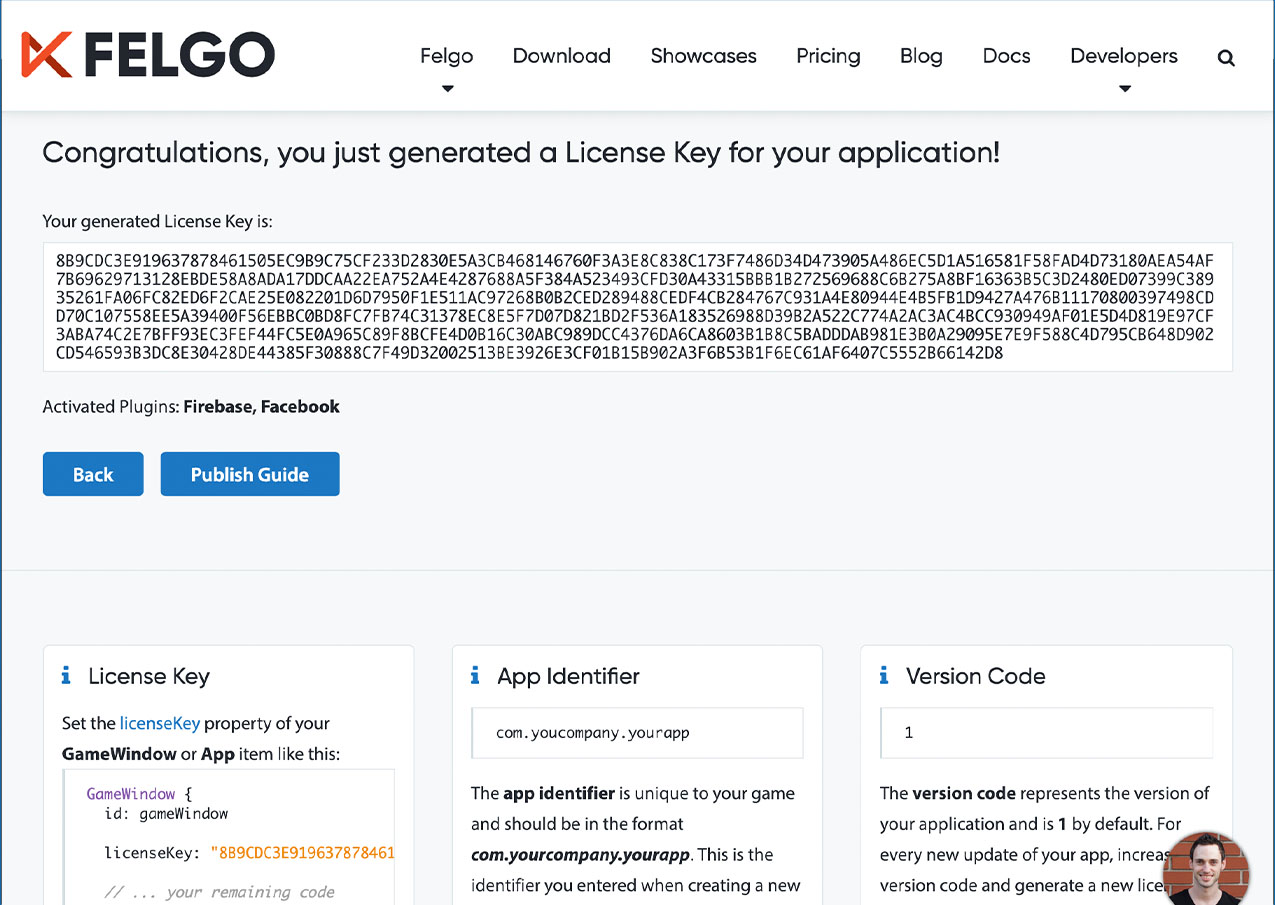
- Click on “Generate License Key” and set the app identifier & version code of your application. You can see that the AdMob plugin was enabled in this license key:
- Copy the generated licenseKey to your GameWindow or App component.
- You can now fully use the selected plugins!
Integration
To use the GameCenter plugin you need to add the platform-specific native libraries to your project, described here:
Project Configuration
Add the following lines of code to your CMakeLists.txt file:
 set(FELGO_PLUGINS
    gamecenter
 )
Note: Make sure to declare the FELGO_PLUGINS before calling felgo_configure_executable, which links the required Frameworks based on your settings.
iOS Integration Steps
- Create a provisioning profile with Game Center enabled at the Apple Developer Account website.
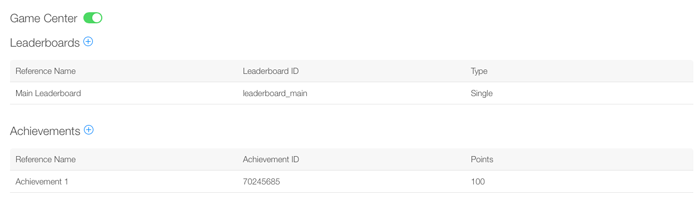
- Make sure to add a new application to iTunes Connect and configure your Game Center leaderboards and achievements.