\contentspageHow to Make Doodle Jump with Felgo
Introduction
Hey, what's up? I heard your game is doing great in the app stores. Downloads are rising, you got some nice reviews and your retention rate is good? Well then, why don't you monetize your game?
As you may already know, ad banners and interstitials are a decent way to do that. There is hardly a game without them. Also it is one of the most effective ways to get money out of your game. And because they are so
widespread, people are already used to them.
In the last part of this tutorial, I will show you how to integrate monetization plugins into your game. At the moment Felgo offers two plugins for monetization: AdMob and
ChartBoost.
Requirements
If you haven't done this already:
- Correctly set up your Qt environment. Follow these install instructions.
- Make sure your project uses the Gradle Build System, as described here.
Since we are using two more Felgo plugins now, also create a new license key. Go to the Felgo license key page. Select Google Analytics (because we integrated it in
the previous part of the tutorial), AdMob and Chartboost. Then generate the license key. Use this new license key in your project.
Integrating AdMob
AdMob (http://www.google.at/admob/) is one of the most famous ad-networks. It is widely used in all kinds of apps to earn money by showing advertisement banners or interstitials.
Setup
Before can include AdMob in our game, we want to correctly setup our project. Depending on the platform you want to use, different steps are necessary.
AdMob iOS Integration
- Download our AdMobSample from here and unzip it.
- Copy
GoogleMobileAds.framework from the downloaded ios subfolder. Paste it into the ios folder in your project directory.
AdMob Android Integration
- Go to the
android folder of your project. Open build.gradle and add these lines to the dependencies block.
dependencies {
compile fileTree(dir: 'libs', include: ['*.jar'])
implementation 'com.google.android.gms:play-services-ads:7.5.0'
}
- Open your
AndroidManifest.xml file. Then add the following lines as children of the <application> element:
 <application>
   ...
   <meta-data
       android:name="com.google.android.gms.version"
       android:value="@integer/google_play_services_version"/>
   <activity
       android:name="com.google.android.gms.ads.AdActivity"
       android:configChanges="keyboard|keyboardHidden|orientation|screenLayout|uiMode|screenSize|smallestScreenSize"
       android:theme="@android:style/Theme.Translucent"/>
 </application>
- Make sure your manifest file has the following permissions:
 <uses-permission android:name="android.permission.INTERNET" />
 <uses-permission android:name="android.permission.ACCESS_NETWORK_STATE" />
adUnitIds
To show ads in our game you need adUnitIds from the AdMob website. We will create one for a banner and one for an interstitial.
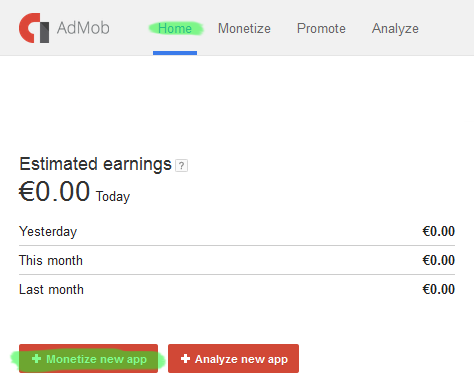
- Sign into your AdMob account. If you don't have an AdMob account yet, you can create one here.
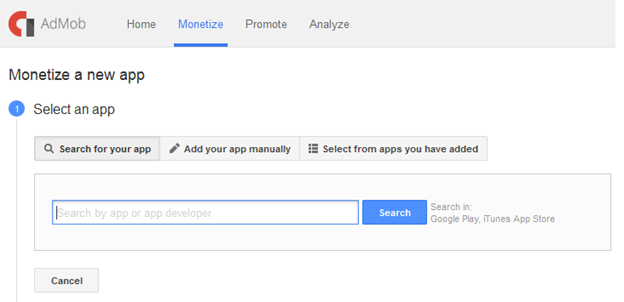
- Click on Monetize new app.
- If you've already published your app you can find it in the Search for your app tab. Otherwise you can add it by clicking on Add your app manually.
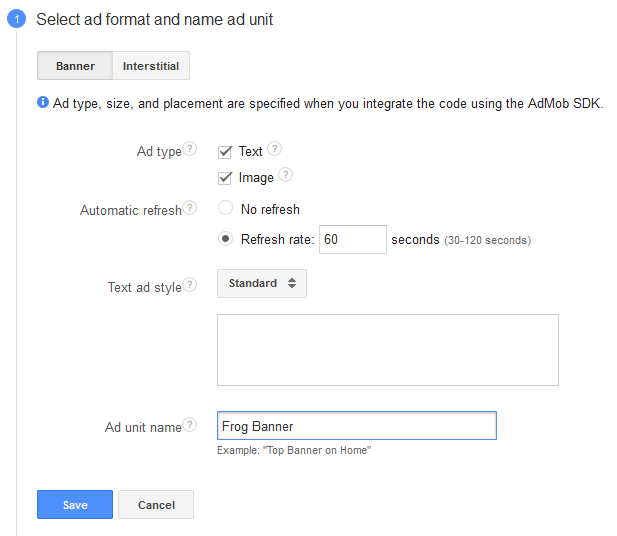
- Create a new Banner, give it a name (e.g. Frog Banner) and save it.
- Now you get your banner's Ad unit ID (e.g. ca-app-pub-12345678910/12345678). We will need this ID later, when we integrate the AdMob plugin.
- Next Create another ad unit.
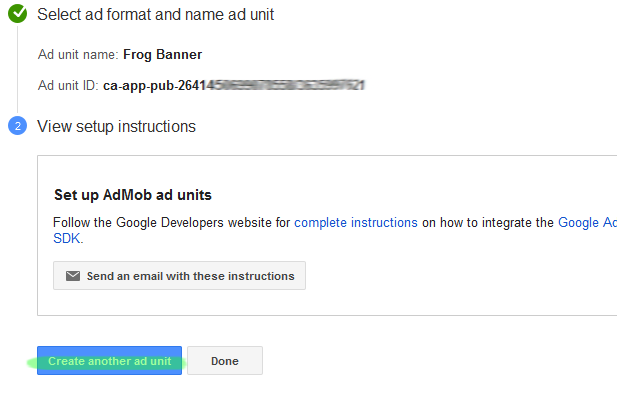
- This time don't create a banner, but an interstitial.
Adding AdMob to the Game
We want to show the AdMob banner and interstitial in our menu. So the first thing to do is importing the plugin to your MenuScene.qml.
import Felgo 4.0
Then add the interstitial and the banner to the game. Add the following code, also to your MenuScene.qml.
SceneBase {
AdMobBanner {
adUnitId: "your banner adUnitId"
banner: AdMobBanner.Smart
anchors.horizontalCenter: parent.Center
visible: !frogNetworkView.visible
}
AdMobInterstitial {
id: interstitial
adUnitId: "your interstitial adUnitId"
onInterstitialReceived: {
showInterstitialIfLoaded()
}
onInterstitialFailedToReceive: {
console.debug("Interstitial not loaded")
}
}
}
Set the respective adUnitId in both elements.
The AdMobBanner doesn't cover the whole screen and is less intrusive than the interstitial. In addition, it automatically chooses its size depending on the screen size, so we don't have
to worry about that. The banner is always displayed immediately, when it is loaded. But we hide hit manually when the GameNetworkView opened. Otherwise it would cover the
leaderboard.
The AdMobInterstitial works differently. It always fills the whole screen, but it is not shown by default. You can show it by invoking interstitial.loadInterstitial().
For testing purposes we are going to create a button in our MenuScene to invoke the interstitial.
Paste this piece of code after the Score button, inside the Column component.
 Image {
   id: admobButton
   source: "../../assets/admobButton.png"
   anchors.horizontalCenter: parent.horizontalCenter
   MouseArea {
     anchors.fill: parent
     onClicked: interstitial.loadInterstitial()
   }
 }

Congratulations, you integrated the AdMob plugin! Now your game is ready to make you some money.
Do you have any questions about the AdMob integration? Then please take a look at the more detailed AdMob integration tutorial. If you face any problems,
don't hesitate to ask in the Felgo Plugin Support Forum.
Integrating Chartboost
Chartboost is another famous ad network. Unlike AdMob, it specializes only in mobile game ads.
Setup
Like with AdMob, we also need to adjust our project, depending on the platform(s) you want to use.
Chartboost iOS Integration
Chartboost Android Integration
- Go to the android folder of your project. Then open
build.gradle file and add the following lines to the dependencies block. The first dependency here is for AdMob, the second one for Chartboost.
dependencies {
compile fileTree(dir: 'libs', include: ['*.jar'])
implementation 'com.google.android.gms:play-services-ads:7.5.0'
implementation 'com.google.android.gms:play-services:7.5.0'
}
- Download the ChartboostAndroid SDK from here.
- Copy chartboost.jar to the
libs folder in your Android source sub-directory. This is probably android/libs in your project directory.
- Open your
AndroidManifest.xml file and make sure that the following permissions are set.
 <uses-permission android:name="android.permission.INTERNET"/>
 <uses-permission android:name="android.permission.WRITE_EXTERNAL_STORAGE"/>
 <uses-permission android:name="android.permission.ACCESS_NETWORK_STATE"/>
 <uses-permission android:name="android.permission.ACCESS_WIFI_STATE"/>
App ID, App Signature
To show Chartboost ads in our game we need two things: an App ID and an App Signature. Follow the steps below to get these for your game.
- Log into your Chartboost account. If you don't have a Chartboost account yet, you can create one here.
- Click on ADD APP. If you've already published your app, you can find it by clicking Import App. Otherwise just add an unpublished app.
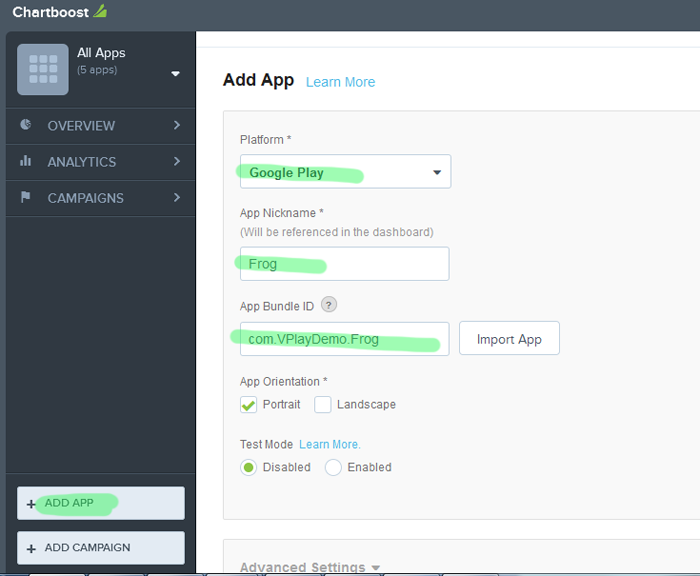
- After you completed the form, you will get an
App ID and an App signature. We will need these in a minute.

Adding Chartboost to the Game
Now we want to add the Chartboost plugin to our game. Paste the following import statement to your MenuScene.qml.
import Felgo 4.0
Then add the Chartboost component.
Chartboost {
id: chartboost
appId: Qt.platform.os === System.IOS ? "yourIOSAppId" : "yourAndroidAppId"
appSignature: Qt.platform.os === System.IOS ? "yourIOSAppSignature" : "yourAndroidAppSignature"
shouldRequestInterstitialsInFirstSession: true
shouldDisplayRewardedVideo: false
onInterstitialCached: {
console.debug("InterstitialCached at location:", location)
}
onInterstitialFailedToLoad: {
console.debug("InterstitialFailedToLoad at location:", location, "error:", error)
}
}
This is pretty straightforward. Just enter your appId and appSignature and you're ready to go. To invoke the interstitial use chartboost.showInterstitial().
Like for the AdMobInterstitial, we are now going to add another button to our MenuScene. With this button you can invoke the Chartboost interstitial.
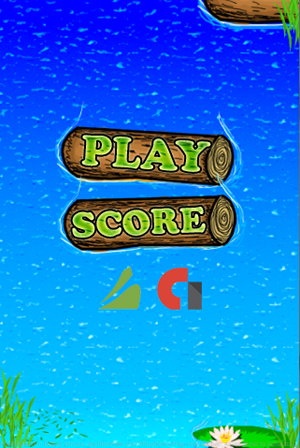
In your menuScene's Column remove the Image, that opens the AdMobInterstitial. Instead add this Row element. It contains two images with a MouseArea for invoking AdMob or Chartboost interstitials.
 Row {
   Image {
     id: chartboostButton
     source: "../../assets/chartboostButton.png"

     MouseArea {
       anchors.fill: parent
       onClicked: chartboost.showInterstitial()
     }
   }

   Image {
     id: admobButton
     source: "../../assets/admobButton.png"

     MouseArea {
       anchors.fill: parent
       onClicked: interstitial.loadInterstitial()
     }
   }
 }
Row works similar to Column. It just places it's elements next to each other, instead of below each
other.
Good job on implementing the Chartboost plugin!
Take a look at this more detailed Chartboost integration tutorial if you have any questions or contact us in our Felgo Plugin Support Forum.
Closing Words
That's it folks - this tutorial is over! Thank you for joining me on this quite long journey.
But you don't have to stop here. Felgo has tons of useful features, plugins and components. Make sure you have a look at them. You wouldn't want to waste your time doing things, that Felgo has an easy solution for.
If you have any questions, don't hesitate to ask them in our support forums.
Also visit Felgo Games Examples and Demos to gain more information about game creation with Felgo and to see the source code of existing apps in the app stores.
If you are interested in the full source code of this demo game, see Doodle Jump Game.
So fare well and good luck on your future game development journey!


