\contentspageHow to Make Doodle Jump with Felgo
Introduction
This is the third part of the How to Make Doodle Jump with Felgo tutorial. In this part we will cover two major features that no game should miss.
- First, I will show you how to add multiple scenes to your game. More specific, we will add a menu scene and handle the navigation between the menu and the game scene.
- And second, we will integrate the Felgo Google Analytics plugin into our game. We will use this to track the number of times each scene is active.
Multiple Scenes
Scene Base
Having multiple scenes is essential for every decent game. To add this feature, we are going to perform some changes in our project.
Create a new file SceneBase.qml in your scenes folder.
SceneBase.qml
import Felgo 4.0
import QtQuick 2.0
Scene {
id: sceneBase
width: 320
height: 480
opacity: 0
visible: opacity > 0
enabled: visible
}
SceneBase.qml is going to be the base class for all our other scenes.
In this class we set the default width and height values for all other scenes. Also we define some basic scene transition properties. We will need those later, to navigate between scenes.
Update Game Scene
Now change the GameScene's root element from Scene to SceneBase.
import Felgo 4.0
import QtQuick 2.0
import QtSensors 5.0
import "../"
SceneBase {
}
Of course, we want to be able to navigate from the GameScene to the MenuScene. So let's prepare a new signal menuScenePressed to your GameScene.qml.
SceneBase {
signal menuScenePressed
}
Signals in QML are a great way to realize communication between components. Whenever you face a situation, where one component should react to an event that occurs in another component, signals are your best friend. To learn
more about signals, see the official documentation here.
After that, we add this Image element just before the last closing } of your GameScene.qml.
Image {
id: menuButton
source: "../../assets/optionsButton.png"
x: gameScene.width - 96
y: -40
scale: 0.5
MouseArea {
id: menuButtonMouseArea
anchors.fill: parent
onClicked: {
menuScenePressed()
frog.die()
gameScene.state = "start"
}
}
}
With this, we have a clickable button, that triggers our signal when it is pressed. We will handle the menuScenePressed signal in our Main.qml later.
Create MenuScene.qml in the scenes folder and paste the following code.
MenuScene.qml
import Felgo 4.0
import QtQuick 2.0
import "../"
SceneBase {
id:menuScene
signal gameScenePressed
Image {
anchors.fill: menuScene.gameWindowAnchorItem
source: "../../assets/background.png"
}
Column {
anchors.centerIn: parent
spacing: 20
Rectangle {
width: 150
height: 50
color: "orange"
Image {
id: gameSceneButton
source: "../../assets/playButton.png"
anchors.centerIn: parent
}
MouseArea {
id: gameSceneMouseArea
anchors.fill: parent
onClicked: gameScenePressed()
}
}
Rectangle {
width: 150
height: 50
color: "orange"
Image {
id: scoreSceneButton
source: "../../assets/scoreButton.png"
anchors.centerIn: parent
}
MouseArea {
id: scoreSceneMouseArea
anchors.fill: parent
onClicked: frogNetworkView.visible = true
}
}
}
}
So we begin with creating a signal to trigger the GameScene transition. Then we set a background image.
The Column element helps us defining the layout of our menu. All elements defined in a Column are
placed below each other. We add two Rectangle elements - these are our menu buttons. The first one leads to the GameScene, the second one to our
GameNetworkView.
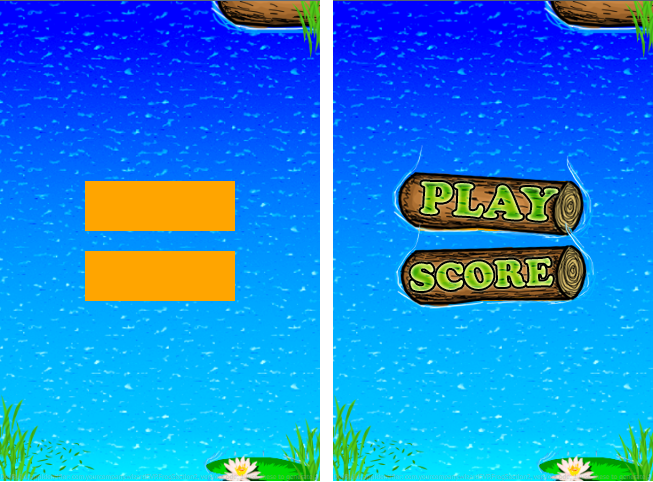
If you are wondering why the two Rectangles are used to create the buttons, here's why: The Column component aligns the buttons based on the fixed height of the
Rectangles. The Image inside is actually bigger. So by using the Rectangle for alignment, the
Images overlap a bit in the middle.
That's all we need for our new scene. So let's add the MenuScene to our Main.qml and move the GameNetworkView from the game scene to the menu scene.
Main.qml
GameWindow {
GameScene {
id: gameScene
}
MenuScene {
id: menuScene
GameNetworkView {
id: frogNetworkView
visible: false
anchors.fill: parent.gameWindowAnchorItem
onShowCalled: {
frogNetworkView.visible = true
}
onBackClicked: {
frogNetworkView.visible = false
}
}
}
}
As the last step, because we now access the game network from the menu, you can remove the makeshift SimpleButton in your GameScene.qml.
Adding the Navigation
So now that our scenes are all set up, we can handle the scene transitions.
In your Main.qml update your GameScene and MenuScene,
Main.qml
GameWindow {
GameScene {
id: gameScene
onMenuScenePressed: gameWindow.state = "menu"
}
MenuScene {
id: menuScene
onGameScenePressed: gameWindow.state = "game"
GameNetworkView {
}
}
}
and finally add this piece of code, to add states and handle state transitions.
GameWindow {
state: "menu"
states: [
State {
name: "menu"
PropertyChanges {target: menuScene; opacity: 1}
PropertyChanges {target: gameWindow; activeScene: menuScene}
},
State {
name: "game"
PropertyChanges {target: gameScene; opacity: 1}
PropertyChanges {target: gameWindow; activeScene: gameScene}
}
]
}
So what's happening here? In the GameScene and MenuScene we handle our navigation signals and change the game's state to either menu or game. Our state machine
then activates and shows the respective scene.
Great, now that we have multiple scenes functionality, it's very easy to add even more scenes. For a more detailed description of how to create games with multiple scenes or levels, check out this tutorial.
Google Analytics
Requirements
Felgo offers many different plugins. They help you to display ads, connect to social media or even add in-app purchases to your game. For a list of all available plugins see here.
To add plugins, like Google Analytics, to your game, you will need the following things:
- A Valid Felgo license, Startup or higher. With a such a license you can use all available plugins. Alternatively, you can also purchase a license for only one individual plugin.
- A correctly set up Qt environment. Follow these install instructions.
- Make sure your project uses the Gradle Build System, as described here.
- For the Google Analytics plugin: A Google Analytics account. You can create one here.
For a guide how to add Google Analytics plugin to your project, please visit the plugin integration page. After you successfully added the plugin,
you can proceed with the next step of the tutorial.
If you have any troubles with the various installation steps, please ask for help in the forums: Felgo Plugin Support.
Using the Plugin
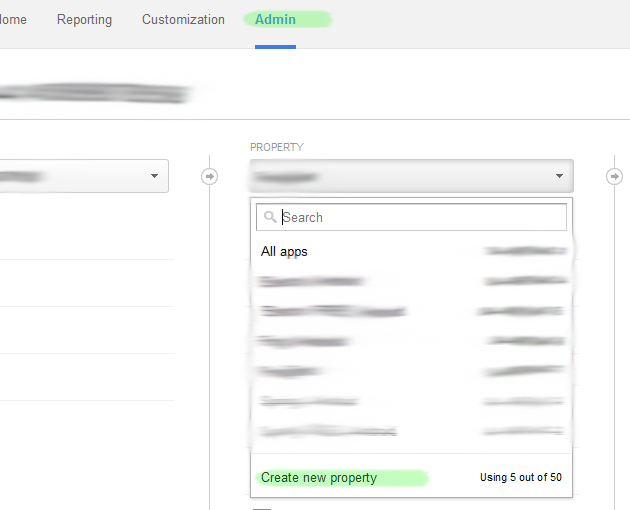
Go to the admin tab of your Google Analytics account and create a new property.
Select Mobile App, enter an App Name and press Get Tracking ID.
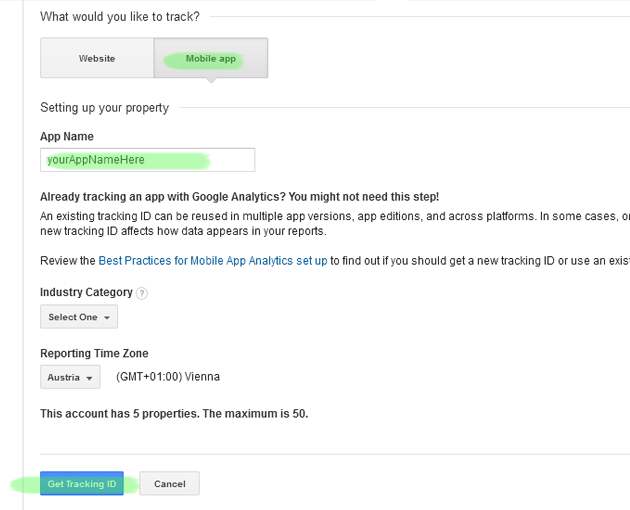
You are going to receive a property ID. This ID will look like this: UA-12341234-1. We will need this property ID to add the Google Analytics Plugin to our game.
Next you will need a Felgo license key, that allows you to use the Google Analytics plugin. You can create a license key here. Just select the plugin
and enter the correct app-identifier and version-code of your project. If you are not sure about these values, you can look them up in your Other Files/qml/config.json file. In case you already have a
licenseKey set in your GameWindow, replace your previous licenseKey with this new one.
Now open your Main.qml and import Google Analytics.
import Felgo 4.0
Afterwards add the GoogleAnalytics element, right after the EntityManager.
GoogleAnalytics {
id: ga
licenseKey: "yourLicenseKey"
propertyId: "UA-12341234-1"
}
Enter both your Felgo licenseKey for Google Analytics and the Google Analytics propertyId. If you already use the licenseKey in the GameWindow, you
may skip adding the licenseKey for the plugin. The GameWindow licenseKey will be used automatically.
Tracking
Now we have everything ready to start tracking the game. There are two functions you can use to track the game.
logScreen(string screenName) let's you keep track of screens.logEvent(string eventCategory, string eventAction, string eventLabel, int value) helps you track events.
Events are a useful way to collect data about a user's behavior. For example you can track button presses or the use of a particular item in the game. Every event has to have at least an eventCategory and an
eventAction.
Now let's add tracking to our game. In your Main.qml add the logEvent function to the MenuScene and the GameScene components.
GameWindow {
GameScene {
id: gameScene
onMenuScenePressed: {
gameWindow.state = "menu"
ga.logEvent("Click", "MenuScene")
}
}
MenuScene {
id: menuScene
onGameScenePressed: {
gameWindow.state = "game"
ga.logEvent("Click", "GameScene")
}
GameNetworkView {
}
}
}
You see it's very simple. We log an event every time the user presses one of the buttons to switch scenes.
To see your collected data go to the Google Analytics page. Open the Reporting tab, click on Behavior in the sidebar, then open the Events subsection.
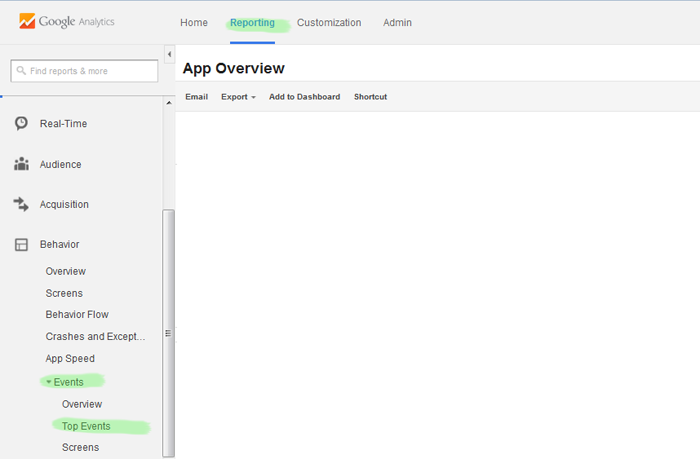
At first everything might look a bit confusing, but I'm sure you'll get the hang of it once you log more events and browse through the data and statistics.
Well Done!
Now you can track your user's behavior and use the collected data to further improve your games. In the next part of this tutorial I will explain how you can monetize your game to earn some money with two more Felgo plugins:
AdMob and Chartboost.


