\contentspageHow to Make Doodle Jump with Felgo
New Project
Create a New - Empty Felgo 3 Project with the name DoodleJump and set the interface orientation to Portrait.
Now put the downloaded resources into the assets folder of your project.
Game Mechanics
Before we write any code, let's think about the main components we will need for our game:
- A GameWindow which holds our Scene, where the game will take place.
- Our main character, the frog, controlled by the player.
- Platforms, for the frog to jump.
Also we want to:
- be able to control the frog via keyboard or touchscreen
- keep track of the score
- and let the frog die, when he touches the bottom of the screen.
Well then, let's get to work!
GameWindow, Scene
First create a new folder with the name scenes as a subfolder of your qml folder. Here we create our Scene, and name it GameScene.qml.
GameScene.qml
import QtQuick 2.0
import Felgo 4.0
import QtSensors 5.5
import "../"
Scene {
id: gameScene
width: 320
height: 480
}
Scene is the component where you put all your game elements. You can have as many scenes as you want. Usually each scene matches a section of your game, like gameScene, menuScene or
creditsScene.
width and height are your logical game size. This means all units and calculations of the game will correspond to these values. Scenes get auto-scaled to match the GameWindow size, find more information about supporting different screen sizes and aspect ratios here.
Next, we implement a GameWindow, which holds our Scene. Open Main.qml (Your Project/QML/qml/Main.qml) and paste this piece of code.
Main.qml
import Felgo 4.0
import QtQuick 2.0
import "scenes"
GameWindow {
id: gameWindow
screenWidth: 640
screenHeight: 960
activeScene: gameScene
EntityManager {
id: entityManager
entityContainer: gameScene
}
GameScene {
id: gameScene
}
}
So we set the width and height for our GameWindow and added an EntityManager and our GameScene.
You can try different width and height values to find a suitable setting for your display. To check screen resolutions of different devices press ctrl+1-9 (Windows, Linux), or cmd+1-9 (Mac).
The EntityManager handles creation, removal and management of all entities in the game.
Now that we have all the basic components in place, let's add a nice background image. To do that, add the following snippet to your Scene.
 Image {
   anchors.fill: parent.gameWindowAnchorItem
   source: "../../assets/background.png"
 }
If you start the game now, you can already see the background image. Looking good, right?
Frog
Next let's add our hero, our main character, the frog. Create a new qml file called Frog.qml in your qml directory and paste the following code into it.
Frog.qml
import QtQuick 2.0
import Felgo 4.0
EntityBase {
id:frogEntity
entityType: "Frog"
GameSpriteSequence {
id: frogAnimation
defaultSource: "../assets/spritesheet.png"
scale: 0.35
GameSprite {
name: "sitting"
frameWidth: 128
frameHeight: 128
startFrameColumn: 2
}
GameSprite {
name: "jumping"
frameCount: 4
frameRate: 8
frameWidth: 128
frameHeight: 256
frameX: 0
frameY: 128
}
}
onStateChanged: {
if(frogEntity.state == "jumping") {
frogAnimation.jumpTo("jumping")
}
if(frogEntity.state == "falling") {
frogAnimation.jumpTo("sitting")
}
}
}
Let's have a look at what we just did.
EntityBase is the base class of all Felgo entities. It enables them to be controlled by the EntityManager.
To animate the frog we add a GameSpriteSequence. Within this component we define the spritesheet source and add a GameSprite for each
animation we want.
We use the following properties to configure each animation:
frameCount is the number of frames in the animation.frameRate sets the speed of the animation.frameWidth and frameHeight determine the size of a single frame of the animation.frameX and frameY define the position of the first frame of the animation.
Finally, we use the onStateChanged event to handle our animation transitions. Depending on the current state, the frog is either displayed as sitting or jumping.
Now it's time to put our frog into the game. Add this code to your Scene:
Frog {
id: frog
x: gameScene.width / 2
y: 220
}
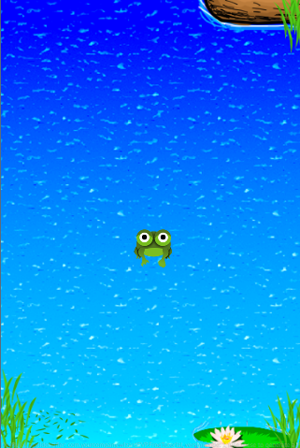
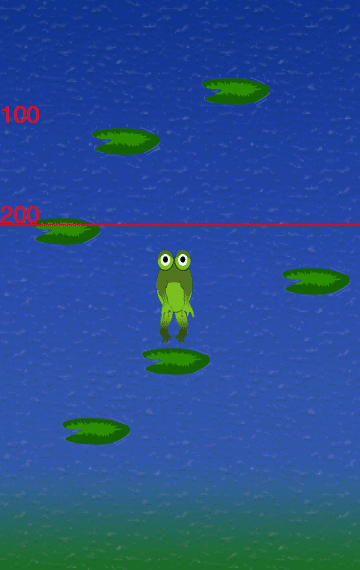
What about that - there's a frog in our pond. Admittedly a boring frog, but nevertheless a frog. Before we can make our frog all moving and exciting, we will add platforms.
First let's sit back and think about the main tasks of our platforms. What are they supposed to do?
- When the frog touches a platform from above, he should jump.
- When the frog jumps, all platforms should move downwards.
- Platforms, that touch the bottom of the screen, should reappear at a random position at the top of the screen.
- A platform should perform a wobbling animation when the frog jumps off it.
Sounds a bit complicated, but fortunately, Felgo has very helpful physics components. These will make most of the steps a walk in the park.
Create Platform.qml in your qml folder and add the following code:
Platform.qml
import QtQuick 2.2
import Felgo 4.0
EntityBase {
id: platform
entityType: "Platform"
width: 64
height: 32
Image {
id: platformImg
source: "../assets/leaf.png"
anchors.fill: platform
}
BoxCollider {
id: platformCollider
width: parent.width
height: parent.height - 20
bodyType: Body.Dynamic
collisionTestingOnlyMode: true
}
}
To handle collisions, we add a BoxCollider. A BoxCollider is a collision rectangle that we set to match the size of the entity. As you can see, the
collider's height is 20 units smaller than the platform. This avoids that the frog jumps too early.
We want to make sure, that our collider behaves the way we want it to, so we set two more properties: bodyType and collisionTestingOnlyMode.
The bodyType of our BoxCollider is Body.Dynamic. This is the default value for bodyType and is usually used for moving objects.
With collisionTestingOnlyMode set to true our platforms only check for collisions. They are not influenced by any physics calculations.
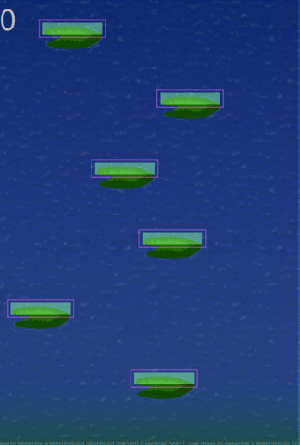
The screenshot below shows the BoxCollider on top of the leafs. The frog jumps when he touches the collider, the player only sees the leaf.
Now add a platform to your Scene, just above the frog, and see what happens.
Platform {
id: platform
x: gameScene.width / 2
y: 300
}
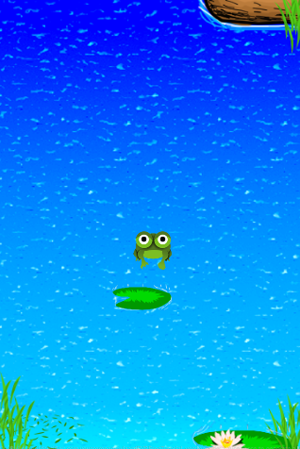
Nothing much yet. There's a frog and a leaf, but not much else going on. We will change that now!
Make the Frog Jump
We need two things to make our frog jump:
- Collision detection and -handling for the frog, when he touches a platform
- Gravity
Collision Detection
Let's take care of collision detection first. Define another BoxCollider, this time for the frog. Put this code after the GameSpriteSequence
component.
BoxCollider {
id: frogCollider
width: 25
height: 5
bodyType: Body.Dynamic
fixture.onContactChanged: {
frogCollider.linearVelocity.y = -400
}
}
The frog's collider is similar to the platform's collider. You already know the width, height and bodyType properties.
With fixture.onContactChanged we listen for any contact with any other physics object. Since the only other objects we have right now are platforms, we want to make the frog jump at any collision. To make him
jump, we set the y-linearVelocity to -400. This makes the frog instantly move upwards. Gravity will then take care of getting the frog back down again.
Note: The fixture.onContactChanged signal is triggered again and again for the duration of the contact. There are two more signals you might find useful – fixture.onBeginContact and
fixture.onEndContact. The first one is only triggered at the beginning of a collision and second one when the collision ends.
Before we add gravity we want to realign our frog's image position to match the new BoxCollider. Add an anchor under the scale property in the GameSpriteSequence component.
GameSpriteSequence {
scale: 0.35
anchors.centerIn: frogCollider
}
Gravity
Add the following code, before all entities (Platform and Frog), to your Scene.
PhysicsWorld {
debugDrawVisible: false
updatesPerSecondForPhysics: 60
gravity.y: 20
}
Start the game and see what we did.
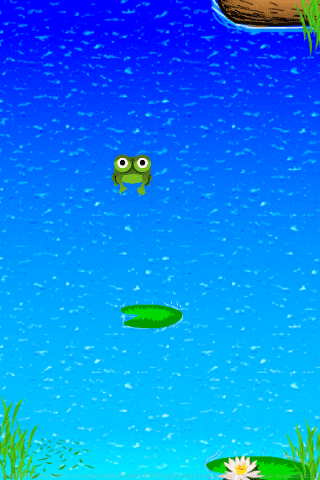
Perfect, the frog is finally jumping!
Feel free to play around with different linearVelocity and gravity values to get a feel for velocities in the game.
Showing the Jump Animation
Since the frog is able to move now, we can also trigger it's animation. We use the linearVelocity.y value to determine if the frog is moving up (jumping), or down (falling). Keep in mind, that the origin of the
game coordinate system is in the top left corner. So a negative y value means the frog is jumping, a positive value means it is falling.
Add this code right beneath the entityType property of your frog:
state: frogCollider.linearVelocity.y < 0 ? "jumping" : "falling"
Remember, we defined the onStateChanged event earlier to handle state changes.
Have a look at the game, the frog is animated now.
Controls
To control the frog on a desktop system with a keyboard, we will use the TwoAxisController. For mobile devices we will use the Accelerometer.
Paste this code into your Scene, to enable both control systems.
Scene {
id: gameScene
Keys.forwardTo: frog.controller
Accelerometer {
id: accelerometer
active: true
}
}
For the accelerometer to work on iOS, also add this to your .pro file.
 ios {
   QTPLUGIN += qtsensors_ios
 }
Keys.forwardTo forwards all keyboard inputs to our frog's TwoAxisController. We will add this in a minute. The Accelerometer works with phone rotation. It will help us to control the frog on mobile devices.
Next we want to handle the user input. In your Frog.qml file, add the following lines right after the definition of the state property.
EntityBase {
property int impulse: y - frogCollider.linearVelocity.y
property alias controller: twoAxisController
TwoAxisController {
id: twoAxisController
}
}
So what exactly happens here?
We will use the impulse property to move all platforms downwards, when the frog gets high enough. Watch this animation to understand how this works.
Then we create an alias called controller for the TwoAxisController. This allows our Scene to access the controller
component.
And finally, we actually add the TwoAxisController. This component simplifies our controls a lot! Basically, when you press left or right on your keyboard, the TwoAxisController sets it's xAxis property to -1 or 1. You can then multiply this value by any number you want to get your desired moving speed.
The Accelerometer, we added to our Scene earlier, works very similar. It just uses phone rotation instead of keystrokes
to determine the direction.
Let's use this new knowledge right away! Add the following line to the frog's BoxCollider:
linearVelocity.x: system.desktopPlatform ?
twoAxisController.xAxis * 200 :
(accelerometer.reading !== null ? -accelerometer.reading.x * 100 : 0)
We use the property linearVelocity.x to move the frog left or right. Again feel free to experiment with different multipliers, to find a value that feels natural to you.
Now run the game and have fun with your animated, jumping and controllable frog!
Game Over
Right now, when our frog falls out of the screen, he will be falling forever. To play on, we have to manually restart the game. That's not what we want, so the next thing to do is to add some kind of Game Over, which
automatically restarts our game.
There's a pretty easy way to do is. We just add a new object, as a border, at the bottom of our screen. Any time the frog touches this object the game restarts. Sounds good, right?
Create another new file called Border.qml in your qml folder.
Border.qml
import QtQuick 2.0
import Felgo 4.0
EntityBase {
entityType: "Border"
BoxCollider {
width: gameScene.width * 5
height: 50
bodyType: Body.Static
collisionTestingOnlyMode: true
Rectangle {
anchors.fill: parent
color: "red"
visible: true
}
}
}
So the border is basically just a BoxCollider. We use a very large width, to make sure the frog can't just fly pst the border.
The Rectangle visualizes the border. This is for testing purposes only. For the final game you can either set visible to false, or
just delete the Rectangle altogether.
Now add a border instance to your Scene.
Border {
id: border
x: -gameScene.width * 2
y: gameScene.height - 10
}
Now you should see a red border at the bottom of the screen.
The next step is to handle the collision between the frog and the border. We will do this in our frog's BoxCollider. We already implemented the fixture.onContactChanged
event. Right now, any time the frog collides with another entity, it jumps. Yes, even on the border - go ahead and try it.
We will change that now. What do we need to do?
- Find out the
entityType of the other entity.
- Perform different actions, depending on the other entity's
entityType.
Sounds pretty straightforward, right? Let's do this. Change the code of the frog's fixture.onContactChanged to this
 fixture.onContactChanged: {
   var otherEntity = other.getBody().target
   var otherEntityType = otherEntity.entityType

   if(otherEntityType === "Border") {
     frogEntity.die()
   }
   else if(otherEntityType === "Platform" && frogEntity.state == "falling") {
     frogCollider.linearVelocity.y = -400
   }
 }
and add a new function to handle dying.
function die() {
frogEntity.x = gameScene.width / 2
frogEntity.y = 220
frogCollider.linearVelocity.y = 0
frogAnimation.jumpTo("sitting")
}
Well done! When the frog now touches the border, we reset his position, velocity and animation. Note that we also added an extra condition for jumping on a platform: the frog now only jumps when his state is falling.
Now, jumping on one platform and dying might be fun, but the real fun starts with multiple platforms.
Moving up
We will do three things in this section:
- Add multiple platforms to allow the frog to jump from one to the next.
- Make these platforms move down, when the frog reaches a certain height.
- Add scoring based on how high the frog can get.
Defining multiple platforms is very easy with Felgo. Just add a Repeater, above the frog, in your Scene.
Repeater {
model: 10
Platform {
x: utils.generateRandomValueBetween(0, gameScene.width)
y: gameScene.height / 10 * index
}
}
A Repeater creates multiple instances of a certain entity. You can set the number of created instances with model. In our case we create 10
platforms.
Once again, feel free to experiment with different values.
Remember when we defined the frog's impulse property in preparation for moving the platforms down? The time has come!
In order to handle the movement of all platforms properly, we need to do three things:
- Actually move all platforms down, when the frog reaches a certain height.
- Handle the collision between a platform and the border. A platform that reaches the bottom should reappear at the top of the screen.
- Limit the frog's y position for jumping up, as we move the platforms down instead.
Movement Animation
So first we add a MovementAnimation to the platform. This will move all platforms down, when the frog's y position is high enough.
MovementAnimation {
id: movement
target: platform
property: "y"
velocity: frog.impulse / 2
running: frog.y < 210
}
The animation's target is our platform and it should affect the platform's y value. We trigger this animation by setting the running property. Every time our condition frog.y <
210 is true, the MovementAnimation is triggered. And finally the velocity property defines how fast the target should move. Here we make
use of the frog's impulse property.
The next step is to make platforms reappear at the top, when they hit the bottom. To do this, we will need collision detection again. Your platform already has a simple BoxCollider. But
like the frog, the platform now also needs to handle collisions, so we add fixture.onBeginContact to the platform's BoxCollider.
fixture.onBeginContact: {
var otherEntity = other.getBody().target
var otherEntityType = otherEntity.entityType
if(otherEntityType === "Border") {
platform.x = utils.generateRandomValueBetween(32, gameScene.width - 64)
platform.y = 0
}
}
This is very similar to the frog's collision handling. We check the entityType of the other object, and if it's a border, we re-set the platform's position.
Limit the Frog's Y-Position
Just one more step and we can have limitless fun jumping with the frog! As said before, we want to limit the frog's y position, to hinder him from jumping too high. This is actually pretty straightforward, just add the
following method to your frog.
onYChanged: {
if(y < 200) {
y = 200
}
}
onYChanged is called every time the frog's y position changes. Inside we check if y is lower than a threshold - in our case 200.
Remember, the origin of the coordinates is in the top left corner. So if the y value is lower than the threshold, the frog is actually above the threshold on the screen.
If the frog is higher, we limit his position.
Now go ahead and see what we did. We finally have multiple, moving platforms and the frog can jump as high as he wants!
Score
Time to add scoring. First add and initialize a new property named score in your GameScene.
property int score: 0
Then increase the score every time the frog gets higher than ever before. Fortunately, we already have a function, in which we permanently check the frog's height: onYChanged in Frog.qml.
onYChanged: {
if(y < 200) {
y = 200
score += 1
}
}
Next reset the score to 0 when the frog dies. You can do that in the existing die() function.
function die() {
frogEntity.x = gameScene.width / 2
frogEntity.y = 220
frogCollider.linearVelocity.y = 0
frogAnimation.jumpTo("sitting")
score = 0
}
Lastly we want to display the score on the screen. So add an Image element, containing a Text element
to your Scene.
Image {
id: scoreCounter
source: "../../assets/scoreCounter.png"
height: 80
x: -15
y: -15
Text {
id: scoreText
anchors.centerIn: parent
color: "white"
font.pixelSize: 32
text: score
}
}
The image is a nice background for our actual score text.
Finishing Touches
We're almost done. The last things we want to do are:
- Add overlay images when the game starts or ends
- Improve the frog's animation
- Add platform animation
Overlay Images
For the overlay images we need to introduce states to our Scene. The gameScene is going to have three states: start, playing and gameOver.
- When the game starts, we set the state to
start.
- A click in the
start state changes the state to playing.
- When the frog dies, we set the state to
gameOver.
- A click in the
gameOver state gets us back to start.
In your Scene add a new property state and set it to "start",
state: "start"
then add a MouseArea, filling the whole screen, to handle some state changes. Add this right before the last closing } of your GameScene.qml.
MouseArea {
id: mouseArea
anchors.fill: gameScene.gameWindowAnchorItem
onClicked: {
if(gameScene.state === "start") {
gameScene.state = "playing"
}
if(gameScene.state === "gameOver")
{
gameScene.state = "start"
}
}
}
Next, add the overlay images, below the MouseArea.
 Image {
   id: infoText
   anchors.centerIn: parent
   source: gameScene.state == "gameOver" ? "../../assets/gameOverText.png" : "../../assets/clickToPlayText.png"
   visible: gameScene.state !== "playing"
 }
The source property defines which image is shown, depending on the current state. We only want the overlay to be visible, when the state is not playing.
Now we need to add some state handling to the frog. When the frog dies, the state should switch to gameOver. Add this line to the frog's die() function:
gameScene.state = "gameOver"
When the state is gameOver, the frog should not be able to move. The easiest way to do this is setting the bodyType to static. Go to the frog's BoxCollider and change the bodyType.
EntityBase {
BoxCollider {
bodyType: gameScene.state == "playing" ? Body.Dynamic : Body.Static
}
}
Now you have some cool overlay images!
Some More Animation
Next, we want to tilt the frogs animation, when he's moving left or right. This will make the movement feel more natural. To do this add and set the rotation property to the frog's GameSpriteSequence.
rotation: frogEntity.state == "jumping" ?
(system.desktopPlatform ?
twoAxisController.xAxis * 15
: (accelerometer.reading !== null ? -accelerometer.reading.x * 10 : 0))
: 0
Finally we add a little animation to the platform, when the frog jumps off it. Paste this into your Platform.qml.
EntityBase {
ScaleAnimator {
id: wobbleAnimation
target: platform
running: false
from: 0.9
to: 1
duration: 1000
easing.type: Easing.OutElastic
}
function playWobbleAnimation() {
wobbleAnimation.start()
}
}
The ScaleAnimator scales the platform's image between the two values specified in from and to. You can start the animation via
the function playWobbleAnimation().
Every time the frog jumps off a platform, we want the platform to wobble. So just call playWobbleAnimation() in the frog's BoxCollider.
BoxCollider {
fixture.onContactChanged: {
if (otherEntityType === "Border") {
frogEntity.die()
}
else if(otherEntityType === "Platform" && frogEntity.state == "falling") {
frogCollider.linearVelocity.y = -400
otherEntity.playWobbleAnimation()
}
}
}
Where to go from here
There you go: You just finished a Doodle Jump game. You can now extend this game any way you want. With existing Felgo components you can add:
Be creative. As for the frog - the sky is the limit!
In the next part of this tutorial we are going to add online leaderboards and achievements with the Felgo Game Network to the game.


